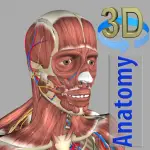

3D anatomy refers to digital, interactive three‑dimensional representations of anatomical structures of organisms (most commonly human anatomy) for education, analysis, and medical use. Rather than flat, static images, 3D anatomy allows users to rotate, zoom, dissect, and explore layers such as bones, muscles, organs, nerves, and blood vessels in a spatial environment. It often integrates labels, annotations, quizzes, and sometimes augmented reality (AR) or virtual reality (VR) modules to enrich learning. 3D anatomy tools improve spatial understanding, provide dynamic perspectives, and let learners engage with structures from multiple angles—making it more effective than traditional atlases or textbooks for many learners.
Pros & Cons
Pros:
Improved spatial understanding: users can see how anatomical parts relate in 3D, not just on flat images. :contentReference[oaicite:0]{index=0}
Interactive and engaging: manipulation, zooming, and layer toggling keep learners active. :contentReference[oaicite:1]{index=1}
Better retention: studies suggest learners using 3D anatomy perform better than those relying solely on 2D resources. :contentReference[oaicite:2]{index=2}
Flexible access: available on computers, tablets, and sometimes in AR/VR formats. :contentReference[oaicite:3]{index=3}
Cost reduction: reduces dependence on cadaver labs, physical models, or costly printed atlases. :contentReference[oaicite:4]{index=4}
Customizable views: hide or highlight specific systems (skeletal, muscular, vascular, etc.). :contentReference[oaicite:5]{index=5}
Updatable: digital models can be revised when new anatomical discoveries arise. :contentReference[oaicite:6]{index=6}
Cons:
Cost or subscription barrier: advanced tools often require payment or licensing. :contentReference[oaicite:7]{index=7}
Learning curve: novices may struggle initially to navigate complex tools or interfaces. :contentReference[oaicite:8]{index=8}
Hardware demands: 3D rendering, VR or AR may lag on low‑spec devices. :contentReference[oaicite:9]{index=9}
Potential oversimplification: some models may abstract or omit microstructures or variants. (Not all anatomical detail is present in every system.)
Reduced tactile experience: cannot fully replace the hands‑on feel of real dissection or cadaver study.
Dependence on software stability: occasional bugs, crashes, or updates may disrupt learning sessions.
Overemphasis on visuals: learners might rely too heavily on images instead of integrating clinical or text knowledge.
Key Features
High‑resolution 3D anatomical models: with bones, organs, musculature, vasculature, nerves, and connective tissues. :contentReference[oaicite:10]{index=10}
Layer control / toggling: ability to show or hide specific systems (e.g. show only skeletal, or overlay muscles). :contentReference[oaicite:11]{index=11}
Annotations and labels: names, descriptions, origins/insertions, innervation, blood supply. :contentReference[oaicite:12]{index=12}
Search tool: quickly find specific anatomical structures or terms. :contentReference[oaicite:13]{index=13}
Rotation, zoom, pan controls: interact with models from any angle. :contentReference[oaicite:14]{index=14}
Cross‑sectional slicing: cut through the model to see internal structures in planes (axial, sagittal, coronal). :contentReference[oaicite:15]{index=15}
Dissection / peel mode: gradually peel away layers (skin, fascia, muscles) to deeper structures. :contentReference[oaicite:16]{index=16}
Quizzes, flashcards & assessments: integrated learning and testing features. :contentReference[oaicite:17]{index=17}
AR / VR / Mixed reality support: immersive modes for better spatial sense. :contentReference[oaicite:18]{index=18}
Annotation / drawing tools: add notes or markups on the 3D model. :contentReference[oaicite:19]{index=19}
Version updates: ability to upgrade or add new anatomical content modules. :contentReference[oaicite:20]{index=20}
Compatibility across devices: use on desktop, tablet, mobile. :contentReference[oaicite:21]{index=21}
Clinical correlations / pathology overlays: show disease states, tumors, deformities. :contentReference[oaicite:22]{index=22}
Functions
Visualization: render anatomical parts in full 3D for display and exploration.
Manipulation: rotate, zoom, pan the model to examine from diverse perspectives.
Layer management: hide or show systems (e.g. muscles, skeleton, nerves) as needed.
Slicing / sectioning: cut through planes (axial, sagittal, coronal) to view interior anatomy.
Dissection simulation: gradually peel layers or dissect away portions virtually.
Annotation and labeling: show structure names, descriptions, and key facts.
Search and highlight: find a structure by name and highlight it within the model.
Quiz & assessment: test knowledge via interactive questions or labeling tasks.
AR/VR immersion: project anatomy in augmented or virtual reality for more realistic spatial context. :contentReference[oaicite:23]{index=23}
Overlay pathology: show disease, tumor growth, or anomalies on the base anatomical model. :contentReference[oaicite:24]{index=24}
Note-taking & drawing: annotate directly on models, draw arrows or highlights for teaching/learning. :contentReference[oaicite:25]{index=25}
Version control / updates: incorporate newer anatomical discoveries or more modules over time.
Multi-platform syncing: sync progress, bookmarks, favorites across devices (desktop to mobile). :contentReference[oaicite:26]{index=26}
Teaching tools: present, switch views, show/hide structures in a lecture or class scenario. :contentReference[oaicite:27]{index=27}
How to Use 3D Anatomy Tools (Step by Step)
Choose a 3D anatomy app or platform: pick one suited to your device (desktop, iPad, AR/VR). Examples include Anatomy.app, 3D Organon, Visible Body, Primal Pictures. :contentReference[oaicite:28]{index=28}
Install or sign up: download or access the web version, register an account if needed, and opt into tutorials or onboarding.
Familiarize yourself with the interface: locate the controls for rotate, zoom, pan, layer toggles, search bar, and menu. Many tools offer brief tutorial prompts.
Select a body region or system: start with skeleton, then add muscles, vessels, or nerves to understand layered relationships.
Use search or index: type the name of a structure (e.g. “femur”, “sternocleidomastoid”) to jump to and highlight it.
Manipulate the model: rotate around axes, zoom in on small structures, and pan as needed to inspect details.
Slice or section: enable cutting planes to view internal cross sections and hidden structures.
Peel / dissect layers: gradually remove outer layers (skin, fascia, muscle) to reveal deeper anatomy.
Annotate and label: toggle labels on/off, read descriptions, or add your own notes or markers.
Use quizzes and challenges: test yourself using built‑in labeling quizzes, multiple choice, or matching tasks.
Switch views and layouts: change between anterior, posterior, lateral views; reposition or center specific structures. :contentReference[oaicite:29]{index=29}
Explore pathology overlays (if available): turn on disease or tumor overlays to see variants or clinical relevance.
Use AR/VR mode (if available): project the anatomy into your physical space or wear a headset for immersive viewing. :contentReference[oaicite:30]{index=30}
Bookmark favorites: mark frequently used structures, save positions or views so you can return easily later.
Sync devices: if supported, ensure your account syncs progress and bookmarks across your devices.
Update or add modules: as new anatomical content or systems become available, download or sync updates.
Use as teaching tool: in class settings, project views, hide or unhide systems in real time to explain spatial relationships.
Combine with other resources: supplement 3D visual learning with texts, lectures, dissection labs, or clinical cases.


 0
0